index page1 page3 page4 homework3
Martha's COIN 74 - Week 3 - Day Two
Icons on the Common Panel of the Insert Menu Bar
Email Link
Named Anchor
this links to a named location within a particular page - if I had actually named it!
Insert Div Tag
Content for New Div Tag Goes Here
Image Place Holder
Flash Button
Date (and Time)
09/28/2006 8:38 AM
Server Side Include
(text file - log of first connection)
Comment
(had to turn on invisible elements in Preferences to see this icon)
Template for Editable Region
EditRegion1 this document has now been turned into a Template - I wonder where it is stored?!
Another issue: this is a warning message I got; one more thing to learn about in the future! For now, I'll save it as a reminder... 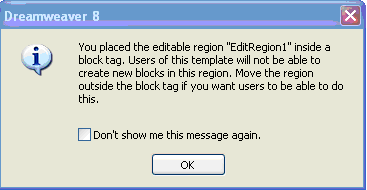
Tag Chooser
Hmm - I don't understand this one; guess I'll have to wait!
Other Menus on the Insert Bar
(information below is copied from our online text)
Layout - The Layout group is to assist in the layout of elements on your page. You will use this category when creating tables, divisions, and layers. Note that some of the icons are optioned-out or dimmed, meaning that they aren't available until you have already created an object that requires the use of one of the icons. We will use the Layout category when you learn tables, css, and layers.
Forms - You will learn to create a simple form to collect data later in the course. The Forms group has all the elements you will need to set up your form. For those who know how to create forms in MS Word, you will find the Forms group to be familiar, as you will create form elements such as text areas, lists, drop down menus, check buttons, radio buttons, submit and cancel (reset) buttons. We will discuss forms later in the course. Remember that these same elements are available through the Insert Menu - Insert>Form.
Text - The Text menu group has some of the same - and a few additional - attributes or options as the Properties Inspector has for selected text. You can work with the Text category for the next part of this lesson when you begin to format text. You can also access Text options from the Insert Menu - Insert>HTML>Text Objects.
HTML - The HTML group includes icons for the horizontal rule, document head and a few other HTML objects which I access when I work in Code View -- we will not use this group at all in this Introduction Course.
Application - This category is for the creation and maintenance of dynamic web sites using databases and server side technologies. We will not use this group in this course.
Flash elements - This was a new feature in DW MX2004. There is one icon button in the Flash elements by default. It is the Image Viewer. The Image Viewer enables you to add interactivity to your pages by creating a slide show interface in which you can present a series of images. You can add captions and links for each image of the slide show. You can also add additional Flash elements through the DW Exchange. I will talk more about the DW Exchange in the later lessons of the course.
Other Toolbars
( information below is copied from our online text)
The Document Toolbar is displayed above the Document window and contains buttons for Code, Split, and Design views; the Title: input text area; buttons for the Browser Check Errors, Validate mark-up, File management, Preview/Debug in browser, Refresh Design View (F5), and View options and Visual Aids. Note that several of the buttons have down pointing arrows indicating there are menu options associated with the button.
The Standard Toolbar is displayed below the Document Toolbar and contains buttons for New Document creation, Open file, Save file, Save All files, Print Code, Cut, Copy, Paste, Undo, and Redo.
The Coding Toolbar is displayed to the left of the Code view window, while the Style Rendering Toolbar displays above the Document Toolbar. Both toolbars contain a number of tools which are extremely useful for HTML and CSS coding, but are beyond the scope of this course.
Status Bar
(again, copied from our online text))
The Status Bar at the base of the Document Window is always visible, and contains a great deal of useful information. In the lower left of the status bar you'll find the Tag Selector, which shows the hierarchy of tags surrounding the current selection. When you click in or on an element on the screen, the Tag Selector will select the corresponding HTML tag to help you differentiate the items on the page...On the right lower side of the Status Bar you'll find icons for the Select tool, the Hand tool (which allows you to click and drag your document), and the Zoom tool and Set magnification pop-up menu (which allow you to set a magnification level for your document). Next are the Window Size drop down menu and the Page Size/Download Speed indicator. The Window Size menu lets you resize your document window to various preset or custom pixel dimensions...The Download Speed indicator displays the approximate file size of the current file, including the dependent media that are embedded into the file, and the approximate download time for the current pages based on the preference you set. You can tailor the connection speed in the Preferences in order to meet the needs of your target audience.
A Warning
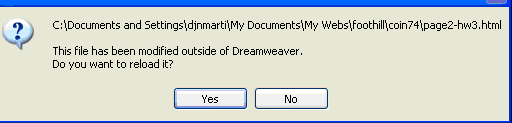
Finally, I'll end this session with another warning. Again, I have no clue what it means. Many mysteries remain. Should be an interesting quarter!
Continue to Day Three of Martha's COIN 74 Week 3 Class Exercises
Return to Martha's HOMEWORK 3
© mjraup 2006
Email: Webmaster